Tuesday, April 26, 2011
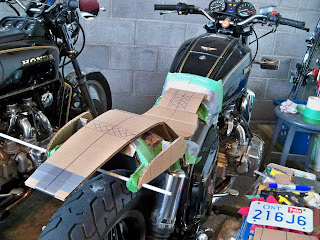
Duct tape has been placed on the frame where the heavy sculpting will happen so it doesn't get hacked and the cardboard is back in place. A new piece of cardboard is in place to widen the butt stop over the sides of the frame horns and another piece is in place for the transition between the the seat and the back of the tank. The hash marks indicate where I will have to cut out the cardboard so the fiberglass can sit on the frame and support the whole thing. The seat will be attached with bolts through the holes in the frame horns originally for the stock fender so I created enough space between the tail sides and horns for T nuts to be fiberglassed in. It is important though to keep this part of the tail in tight to the frame because the frame is already quite wide here
Tuesday, April 19, 2011
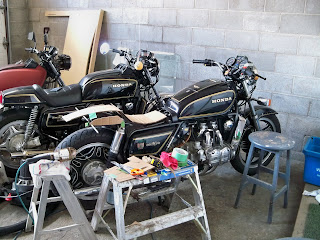
It has warmed up a little in my garage so I removed the ugliness that is the seat, rear fender, tail light, licence plate and turn signals. I'm going to make a new tail section so I'm trying to determine the basic proportions. With a piece of cardboard, a silhouette can be created once the position of the butt stop is locked down and the seat height is set. This involves much trial and error with me on and off the bike multiple times figuring out my riding position. Now I know it just looks like a piece of cardboard tossed onto the frame but now I have determined that the seat will be as low as it can be over the tank and go up over the back of the faux tank, be supported on the 3 cross members that the stock seat sits on, the position of the butt stop and the length of the tail
Monday, April 11, 2011


 I haven't done much bike wise over the winter but I did get the tail lights for the 1100 started
Two LED stop/tail lights are going to be used as stop/tail lights and turn signals
They will be mounted to the back of the shocks
The lights have a large plug on the back which is in the way since I want to mount the lights flat against the shocks. I ground the plug off down to the circuit board and soldered 3 wires on. This was all covered with Bondo Glass flush with the back of the light, with the wires exiting to the side
The lights will be faired into the shocks with Bondo Glass so they don't look like the ghetto Princess Auto lights that they are.
Subscribe to:
Posts (Atom)


